No Frills Yet Delicious Sourdough Bread Loaf
INGREDIENTS
3-1/2 Cups (475 grams) all-purpose flour
1/2 Cup (100 grams) active sourdough starter. It should be bubbly
1-1/3 Cups (325 grams) water
1 Tsp (5 grams) sea salt
INSTRUCTIONS
Feed your sourdough starter 4-12 hours before starting this dough. It should be bubbling when you begin.
Combine flour, active starter, water, and salt in a large mixing bowl. You can use a spoon or your hands. Cover the bowl (tea towel, plastic wrap, or a lid) and allow the dough to rest for 30 minutes. This lets the flour get hydrated from the water you mixed in. The fancy term for this step is “autolyse”.
After the autolyse time is up, take hold of the dough by the edge and pull it upwards to stretch it out. Then, stuff the bit in your hand down into the center of the bulk of the mass. Turn the bowl a quarter turn and do that again. Do this four times total and you will have pulled the dough all the way around.
Do the stretching step three more times, at half hour intervals.
Here’s a trick for busy people getting on with their day who might lose track of how many stretching sessions they’ve done: Get three teaspoons out of the drawer after the first stretching round and set them near your dough bowl. Every half hour when you do a stretching session, put one spoon back in the drawer. When the spoons are gone, you are done stretching.
Cover the bowl again. Let the dough rest in a warm place until it has doubled in size. This is called the “bulk ferment”. Sometimes this takes six-ish hours. For me, it happens overnight as my kitchen is a bit cool and drafty. It will take as long as it takes. Once it’s doubled in size (don’t let it go further, over rising isn’t helpful), move on to the next step.
Peel the dough out of the bowl and plop it on a clean, lightly floured surface. Tug at the dough edges and fold them to the center to form a ball. Pinching the dough together can help those folds stay in place. Let the dough ball rest on the floured surface for 15 minutes.
Plop the dough ball into a 9″ x 5″ loaf pan that has been lined with parchment paper. (I break my own rule often and simply oil the inside of the pan. This probably makes serious cooks scream, but I like what it does to the bread crust. For the sake of publishing a legit recipe, I’m advising you to use the parchment paper.) Throw a clean tea towel over the loaf pan and let the dough rise into a nice plump loaf shape. In my kitchen that takes about four hours.
Move a rack in your oven to the middle position (a high rack means your bread might get scorched on top), and heat your oven to 450 degrees.
With a very sharp knife or a razor blade, make a cut down the center of the bread, the long way. Or make some fancy cuts all down the loaf. Whatever you like. The surface tension created from your pull-folds is pretty strong and won’t allow the bread to expand without a few cuts.
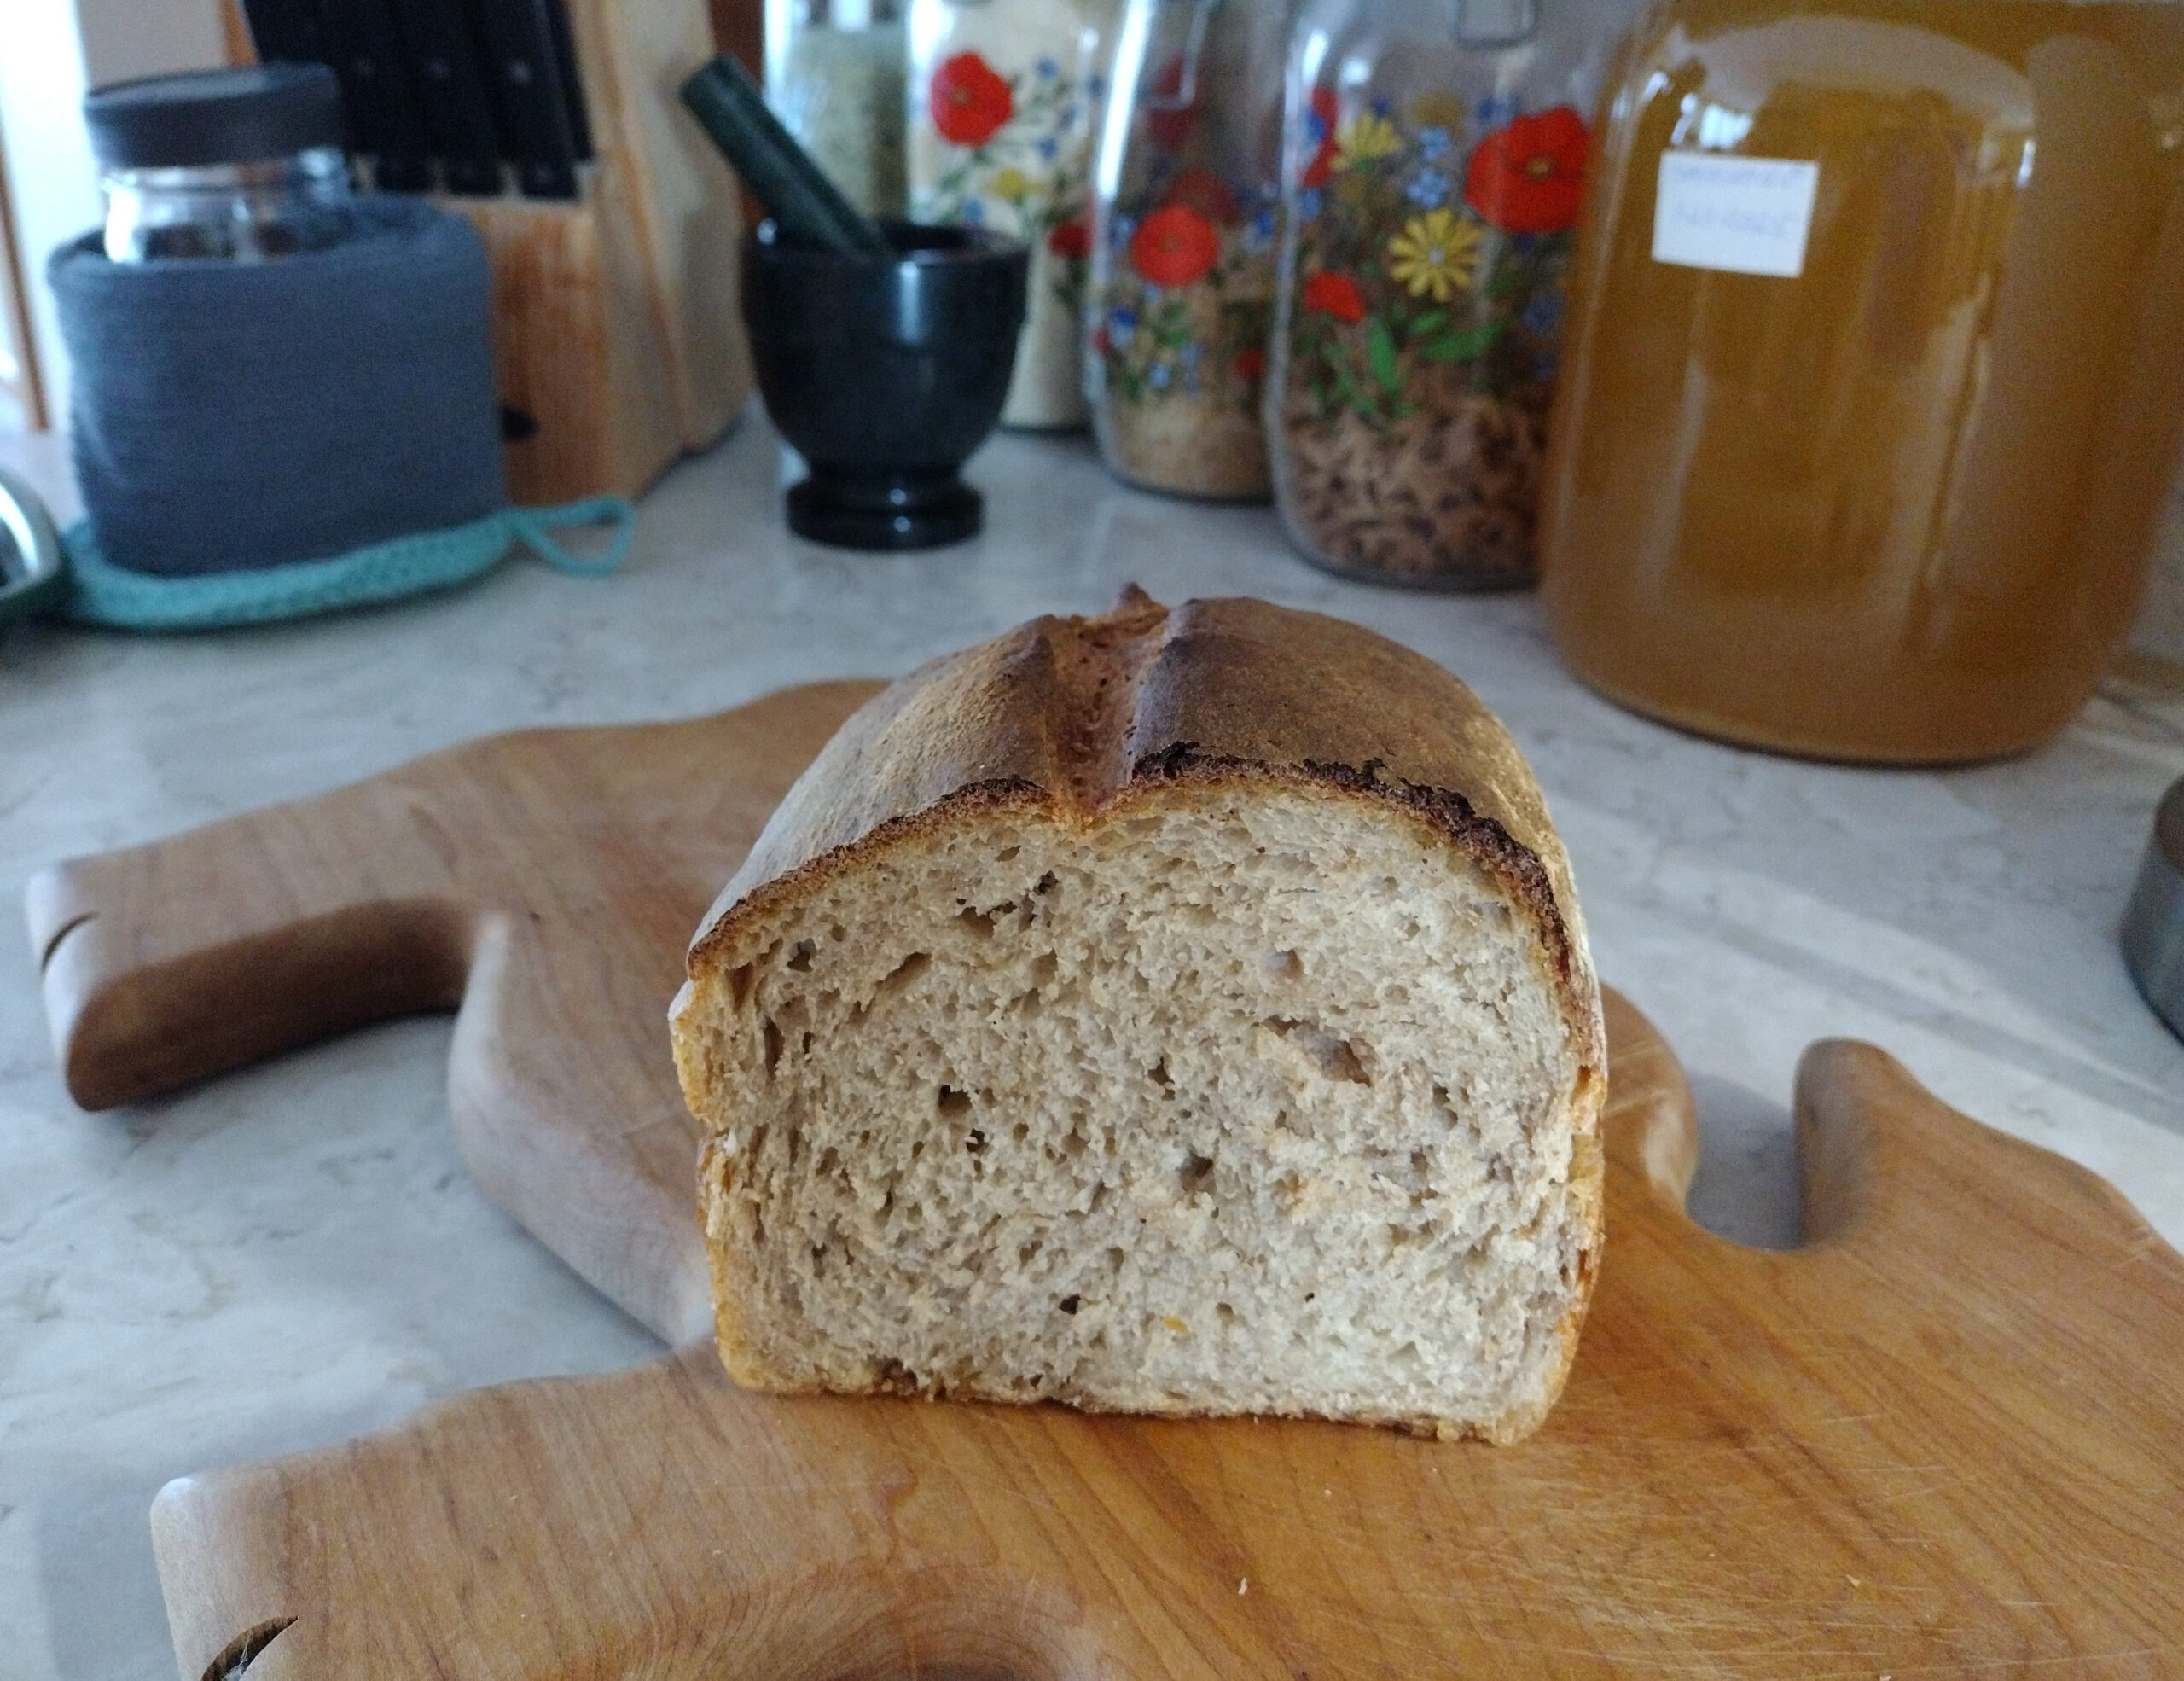
Bake your loaf for 30-40 minutes. It’s done when the top is golden brown, and tapping it with a wooden spoon makes a strong hollow sound.
Tilt the loaf out of the pan and let it cool completely on a breadboard before cutting. You may need to use a serrated knife to get through the crust. Tilt the knife to the side and come at it from an angle and it should cut more easily.
I discovered that my loaves fit perfectly into brown paper lunch bags. I roll the bag opening shut and clip it with an Acco clip, and the bread stays crusty yet protected for days.

My Gramma Levely always told me that bread crusts would make my hair curly. This was an odd thing to tell a kid who had been born with very curly hair. But I always listened to Gramma’s advice, so for years I avoided the crusts, not wanting to make my hair get any worse. My hair got worse anyway. So MY advise is to eat the delicious, crunchy crusts!
And if your hair gets curlier, well, it must be the humidity.

Lori Alden Holuta
Lori Alden Holuta lives between the cornfields of Mid-Michigan, where she grows vegetables and herbs when she’s not writing, editing, or playing games with a cat named Chives.
